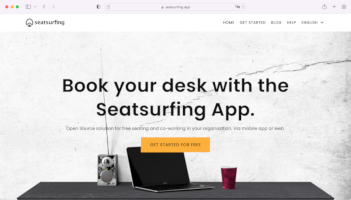
Increasing Google Chrome’s Scroll Speed
On my Ubuntu 11.10 system, scrolling through pages using Google Chrome was terribly slow using the mouse wheel.
Here is an easy way to fix this: Launch Chrome with the parameter --scroll-pixels=n, where n is the number of pixels to scroll. For example:
google-chrome --scroll-pixels=400
To integrate this parameter into the desktop shortcut link, open the following file as root: /usr/share/applications/google-chrome.desktop
Search for the line "Exec=/opt/google/chrome/google-chrome %U" and replace it with "Exec=/opt/google/chrome/google-chrome --scroll-pixels=400 %U". Now, you can easily start Chrome using your desktop shortcut and the mouse scroll speed should be improved.
Java’s SecureRandom.generateSeed() on Linux
On my Ubuntu server, running the following Java code caused the application to hang:
for (int i=1; i<=1000; i++) { SecureRandom random = new SecureRandom(); // Deprecated: byte[] iv = random.getSeed(16); byte[] iv = random.generateSeed(16); System.out.println(i); }
The code runs smoothly on Windows, but hangs on Linux. I found out that with Java 5 or later, you need to run your application with the following parameter:
-Djava.security.egd=file:/dev/./urandom
Alternatively, you can modify the file jre/lib/security/java.security so that the following property is set permanently:
securerandom.source=file:/dev/./urandom
This applies to JRE 5, JRE 6 and JRE 7.
By the way: In Java 1.4, the default setting is /dev/random, which tends to block if there is no I/O action. Changing the setting to /dev/urandom (as above) fixes the issue here.
For further information, have a look at this bug report.
How to set up a chrooted Debian Environment on Fritz!Box Fon WLAN 7390
Setting up a chrooted Debian Environment on the Fritz!Box 7390 allows you to run almost any software on your Fritz!Box (at least, if it's compatible with the box' MIPS CPU). These instructions shouldn't harm your Fritz!Box if you follow them carefully - however, there's no warranty, you do it on your own risk.
To get started, you need the following:
- A Debian based system with debootstrap installed (aptitude install debootstrap)
- Telnet must be activated on the Fritz!Box (with latest firmware, just call #96*7*)
- An USB flash drive with at least 512 MB free space, formatted as ext2/3
Note: We will set up Debian Lenny, as Debian Squeeze seems not to be compatible with the kernel employed by the Fritz!Box. You will get errors like "Cannot utime: Unknown error" using dpkg or tar with Squeeze. Read here (German) and here for more information.
The entire setup takes about one hour.
Let's start:
- On the Debian based system, mount the USB flash drive and create a new directory 'lenny' on it.
- Execute the following command (after correcting the path to your lenny folder):
debootstrap --foreign --arch=mips lenny /mnt/usb/lenny ftp://ftp.de.debian.org/debian/ - After debootstrap completed, connect the USB flash drive to the Fritz!Box.
- Log in to the Fritz!Box via Telnet. When prompted for a password, use the one you set for the web interface.
- Change directory to /var/media/ftp/. Your USB flash drive should be mounted automatically as USB2-0-FlashDisk-00.
- Get a Busybox version that features chroot, such as the busybox_1.16.1_7390_static.bz2 from here and extract it into the current folder.
- Mount proc: mount -t proc proc /var/media/ftp/USB2-0-FlashDisk-00/lenny/proc
- Let debootstrap complete the installation: ./busybox_1.16.1_7390_static chroot /var/media/ftp/USB2-0-FlashDisk-00/lenny /debootstrap/debootstrap --second-stage
- The installation is completed now. You can use the following script to chroot into your freshly installed Debian environment:
cd /var/media/ftp export DISTDIR=USB2-0-FlashDisk-00/lenny umount $DISTDIR/proc mount -t proc proc $DISTDIR/proc rm -f $DISTDIR/etc/fstab touch $DISTDIR/etc/fstab cp -f /etc/resolv.conf $DISTDIR/etc hostname > $DISTDIR/etc/hostname cp -f /etc/hosts $DISTDIR/etc ./busybox_1.16.1_7390_static chroot $DISTDIR /bin/bash
Thanks to the users at IP-Phone-Forum.de and Freetz.org!
How to use Apache HttpClient (DefaultHttpClient) with HTTPS/SSL on Android
Connecting to an HTTPS address using the Apache HttpClient shipped with Android is not so straight forward. Whether the server's certificate as correct or not, you will probably see one of these exceptions:
javax.net.ssl.SSLPeerUnverifiedException: No peer certificate.
Here is a "quick and dirty" solution which makes the HttpClient trust any certificate without verifying it (not recommended to be used in productive environments, of course). Read more...
Creating & Parsing WBXML with Java using kXML 2
WBXML (WAP Binary XML) is a binary representation of XML. It is used e.g. by the Microsoft Exchange ActiveSync protocol.
Only very few WBXML parsers for Java seem to be available. One of the libraries you will probably come across when searching for a WBXML Java Library is kXML. kXML is a small XML pull parser, specially designed for constrained environments such as Applets, Personal Java or MIDP devices (see kXML's about page).
Getting started with kXML is a bit tricky, since you find only a handful of tutorials that are suitable for kXML 2. These snippets should make it easier for you. Read more...
Android SDK with 64bit Java SE Development Kit (JDK)
The Android SDK installer (r10 in my case) doesn't support the 64bit version of the Java SE Development Kit (JDK) out of the box. You will see an error message such as "Java SE Development Kit (JDK) not found".
Instead of installing the 32bit version of JDK, try the following workaround that I've found in the codearetoy blog.
Warning: Use these instructions at your own risk! Damaging the registry may lead to unexpected results and/or data loss!
- Open regedit.
- Navigate to HKEY_LOCAL_MACHINE\Software\JavaSoft\
- Export the entire content.
- Open the .reg-File you've saved the export to with an editor and replace "HKEY_LOCAL_MACHINE\SOFTWARE\JavaSoft\" with "HKEY_LOCAL_MACHINE\SOFTWARE\Wow6432Node\JavaSoft\".
- Double-click the .reg-File to run the import.
- Run the Android SDK installer again - it should work now.
Outlook Web Access 2010: HTTP 500 Error after authentication
If you experience HTTP 500 Errors after logging in to Microsoft Outlook Web Access (OWA) powered by Microsoft's Exchange Server 2010 SP1, you should check if the service "Microsoft Exchange Forms-Based Authentication" (in German versions: "Formularbasierter Microsoft Exchange-Authentifizierungsdienst", MSExchangeFBA) is running. If it's not, start it and change the run option to "Automatic (delayed run)".
Server Name Indication (SNI) with IIS 7.5
Using virtual hosts with HTTPS (so called "Server Name Indication"/SNI) is officially not supported by Microsoft's Internet Information Services IIS. However, there is a workaround which has been documented on YouTube: http://www.youtube.com/watch?v=zVCmzBfx3BE
Here are the steps:
- Edit the site's binding and add an HTTPS Binding. Ignore the host header now, this will be added later.
- Open a command prompt (cmd).
- Change directory to C:\Windows\system32\inetsvr
- Enter the following command (replace "Your Site Name" and "www.yoursite.com" with the appropriate values): appcmd set site /site.name:"Your Site Name" /bindings.[protocol='https',bindingInformation='*:443:'].bindingInformation:*:443:www.yoursite.com
Update: Unfortunately, this doesn't seem to be a solution for SNI. IIS can only bind certificates to IP addresses, not hosts. So if you change the certificate for one site on one IP address, all sites hosted on this IP address will be updated as well. So far, the only solution to use different certificates with a single IP address is to use different TCP Ports. However, the guide above allows you to set up multiple SSL hosts sharing one certificate on one IP address/port.
Error 0×80070021 when using lighttpd’s WebDAV with Windows 7
When trying to use WebDAV provided by a lighttpd installation with Windows 7, you will probably encounter the following error message when copying files to the WebDAV folder:
Error 0x80070021: The process cannot acess the file because another process has locked a portion of the file.
The reason for this error is that mod_webdav is "far away from 100%" (see http://redmine.lighttpd.net/wiki/1/Docs:ModWebDAV). I guess it's caused by the circumstance that shared locks are handles as exclusive locks (not sure about that). There is a bug open in lighttpd's issue tracker for 3 years: http://redmine.lighttpd.net/issues/1492
For now, the only opportunity I see is to switch to Apache. That's really sad, lighty is so nice except for this bug.
Tomcat & Apache: High CPU Usage
Summary: Tomcat running behing an Apache Frontend Server can cause high CPU Usage on the Java Process. Here are several approaches how to fix it.
Setup: Debian GNU/Linux, Java Runtime Environment (JRE) 1.6, Apache 2.2, Tomcat 6.0.29, mod_jk/mod_proxy
Effect: Accessing web applications directly through Tomcat doesn't cause any problems. When accessing web applications through the Apache Frontend Server (forwarding requests by using mod_proxy), it took a few seconds and the cpu usage of the Java process went up to 99.9 %. Obviously, the combination of Apache and Tomcat is causing this problem.
Fix: There are several approaches that could help to fix the issue:
- Make sure you're using a newer version of the APR Tomcat Native Library than 1.1.4. See: https://issues.apache.org/bugzilla/show_bug.cgi?id=40909
- If you're using mod_proxy to forward requests from Apache to Tomcat, switch to mod_jk. It is more mature than mod_proxy, although mod_proxy is sometimes consideres to be the successor of mod_jk. For a comparison of both, see: http://community.jboss.org/blogs/mladen.turk/2007/07/16/comparing-modproxy-and-modjk
- What finally solved the issue for me: Set a Connection Timeout for the AJP Connector in Tomcat's server.xml (see http://tomcat.apache.org/tomcat-6.0-doc/config/ajp.html). Here is an example:
<!-- Define an AJP 1.3 Connector on port 8009 --> <Connector port="8009" protocol="AJP/1.3" redirectPort="8443" enableLookups="false" keepAliveTimeout="20000" executor="default" connectionTimeout="5000"/>